Caulking is an easy and effective way to improve the overall appearance of your room, prevent mildew, and cut down heating and cooling costs. All it takes is a few simple steps to enhance the look, efficiency, and general well being of your home. Here’s how!
When to Caulk
- If your current caulk is discolored or starting to pull away
- If you have unseemly gaps in your baseboards, moldings, and trims
- If you want to increase the energy efficiency of your home- caulking around cables, pipes, doors, and other crevice-prone areas can save you ten percent or more in heating and cooling
Note: Do not caulk the small cavities in your storm windows; the holes, called “weep holes”, prevent moisture from building up between the window panes.
How to Caulk
- Get Rid of Old Caulk
Use a razor to scrape away any old caulk, and use a little water and dish soap to clean the area of any dirt or residue. Then, dry the area in order to start with a clear and dry surface. Whatever you do, do not skip this step! Preparation is essential and if the surface is not clean, your caulk will not adhere as well. This, in turn, will cause the caulk to pull away from the surface prematurely.
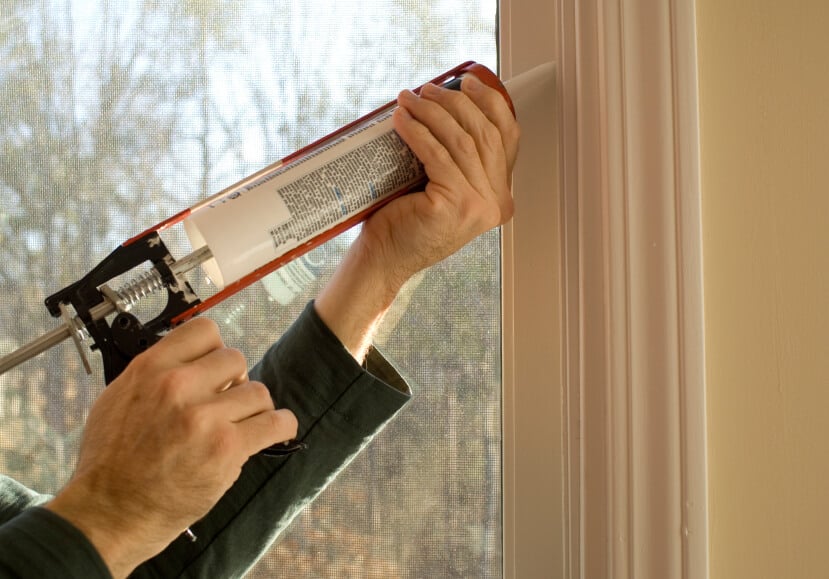
- Select New Caulk
Select a caulk based on your needs and desired method of application. There are two kinds of caulk: a mildew-deterring type and an all-purpose type. Use the mildew-deterring type in areas that are exposed to high moisture, such as bathrooms. Use the all-purpose type for all other dry area caulking needs. You may also choose between two different kinds of applicators: a caulk gun with cartridges or a squeeze tube that you apply with your hands. Use whichever seems the easiest to handle!
- Tape the Joint
Tape the joint (area you want to caulk) in order to make a neat, even line. This will also help you control the gap size and produce a uniform bead.
- Apply Caulk
Apply the caulk, starting at the bottom of the opening in order to prevent bubbles from forming. After you are done applying, smooth (“tool”) the joint by wetting your finger with a little water and running it along the bead, pressing the caulk down into the joint. Finally, strip off the tape and allow the caulk to dry, revealing a pristine, skillfully finished job. Now that’s something to caulk about!