How are USB chargers like socks? There’s never a matching cord and adapter when you need one. Like the black hole in the drier that sends all left socks to another dimension where they will never be seen again, some hidden force in the universe eats those little two-pronged adapters. Oh, the cords are everywhere. In fact, they seem to multiply at an uncontrollable rate. Are the adapters transforming into cords when we aren’t looking? Who is at the bottom of this evil plot?
Whatever the cause, that phone’s not getting a charge till you find a way to plug it in. Of course one can plug it into the USB outlet of their computer once they have managed to free one up…or find it, but it takes forever to charge this way and it’s a pain, plain and simple. It seems easier just to buy another adapter. The hidden forces seem to be winning this fight. Perhaps it’s an ingenious plot by the local electronics store to increase profits.
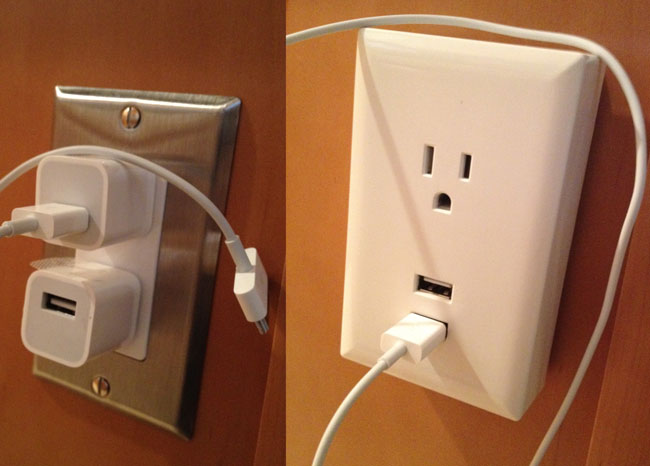
Easy One-Step Plug in USB Wall Plate Charges
There is an option to circumvent the evil plot once and called a USB Wall Outlet. Now you will always have a place to quick charge your favorite devices, and as a bonus your outlets will look sleek and modern.
Interested? There are two options. The first option is the easiest. RCA sells plug-in wall plate chargers in three different styles that can simply be plugged into the existing outlet in seconds. The upside of these outlet adapters is that they are easy to install and some even come with a night light. On the downside, they stick out and don’t look nearly as neat as the built-in options. Not to mention the fact that they are susceptible to the same fate as your other adapters if they are not screwed into a solid surface.
Replacing Existing Wall Sockets with USB
The second option will take at least ten times the effort, but if you are comfortable with small home repairs and have some modest electrical skills, it will look really cool when you’re done.
- First, measure the depth of the electrical junction boxes that you want to replace. Make sure that they are not GFCI outlets as this option isn’t available yet with a USB outlet.
- Next, make sure that the USB outlet you buy will fit inside the depth of your junction box. If not, you will need to replace the junction box as well. Don’t forget to pick up drywall patches and matching paint.
- Find your main circuit breaker and cut off the power to the room that you are working in. Make sure you have an alternate source of light, and make absolutely sure the power is OFF.
- Now remove the wall plate for the outlet that you are replacing and put it aside. FYI they make great targets for skeet shooting practice when you’re done.
- Unscrew the outlet and take make notes to show where each colored wire is connected.
Once you are sure of your notes, remove the wires. - If the USB outlet you have selected has only one neutral wire terminal and you have a middle-of-run wire setup, it will be necessary to combine the wires with a knot and some extra wire.
- Connect the wires to the new outlet exactly as diagrammed, taking care to remember the ground as well.
Tuck the wires carefully back into the junction box and screw the new outlet in. - Once you have turned your power back on, check to make sure the outlet is functioning properly. If not, check the placement and connection of the wires.
Before you screw in the wall plate cover, make sure to turn the power back off, just to be safe.
You are now the proud owner of a fancy new wall socket and will never again be victimized by the diabolical plot to misplace all of your adapters. Now, where did that USB plug go? There were hundreds of them laying around here just a few minutes ago!